• Another collab with nizima LIVE, health update, and more!

    Second collaboration with nizima live

    After the nizima LIVE team saw my post on X/Twitter, I’m thrilled to share that the nizima LIVE team has reached out to me again for another collaboration!

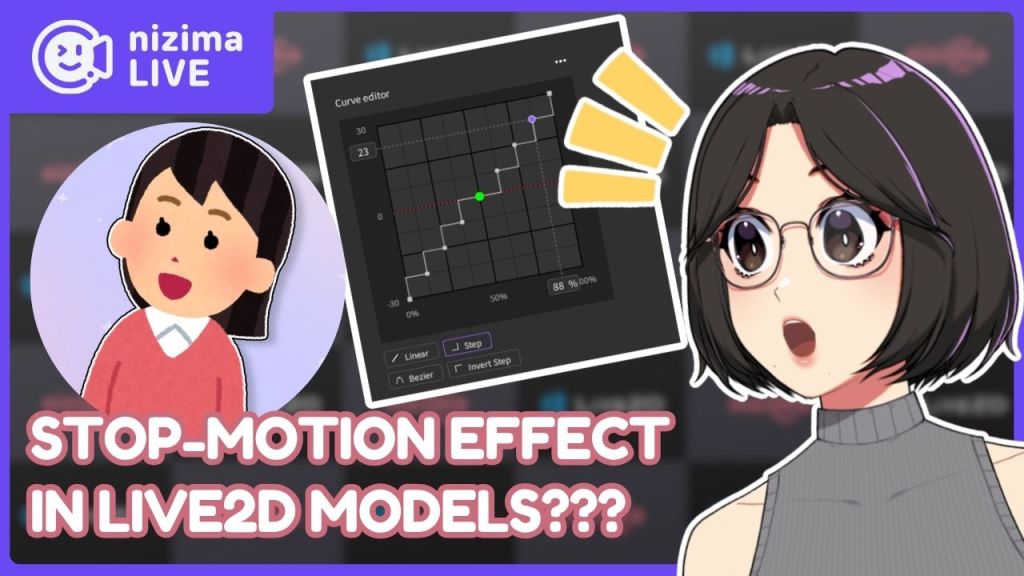
    This time, I made an in-depth video about nizima LIVE’s Parameter feature! I talked about how to use the Parameter feature, how to fine-tune Live2D models, and how to create a stop-motion effect using the Parameter Feature.

    Check out the video if you want to learn more about it. Thank you to nizima LIVE and Live2D Inc. for sponsoring this video!

    In my X/Twitter post, I demonstrated how to give a Live2D model a stop-motion effect using nizima LIVE! I never expected it to gain so much attention, but I’m grateful for the opportunity it created. It allowed me to collaborate once again with the nizima LIVE team and Live2D Inc., and I’m truly honored to work alongside them.

    Working on my second collaboration with nizima LIVE was an exciting challenge, especially when it came to editing the video.
    This time around, I decided to do everything in DaVinci Resolve Studio, a big shift from my first project where I used Adobe After Effects and Adobe Premiere Pro.

    One of the biggest differences I noticed was speed. DaVinci Resolve Studio made the entire editing process much more efficient, from timeline adjustments to rendering. In many ways, it feels like Adobe After Effects and Premiere Pro combined into one program.
    I was also able to use DaVinci Resolve’s Fusion page, which, based on my experience, is the “After Effects” section of DaVinci. Working with Fusion Nodes was completely new to me, so I had to take some time to understand how they function.

    Since this was my first time editing a long-form video entirely in DaVinci Resolve, I had to adapt to a new workflow, but I quickly realized how streamlined it was compared to my previous setup.

    In the end, I’m really happy with how it turned out. It was a great opportunity to push my skills further, and I’m looking forward to seeing how this experience influences my future projects.

    Health-Scare during a busy month

    In mid-May, I noticed a lump on the right side of my neck. At the time, I was juggling commissions and editing the nizima LIVE video, making it one of the busiest periods of the month.
    Discovering the lump in the middle of everything made me incredibly anxious, and I broke down in tears.

    We had to leave town immediately to get it checked and ended up staying at a friend’s place for a day or two.
    The doctor suspected it might be a viral infection, but since I wasn’t experiencing any other symptoms, they simply prescribed milk and vitamins. Definitely not what I expected!

    I was advised to monitor the lump for a week and return for an ultrasound. Coincidentally, that week was also when I wrapped up the video and submitted it for approval, which thankfully got the green light.

    When I went back for the ultrasound, the lump had completely disappeared.
    The relief I felt was indescribable, and with the collaboration finished, I could finally shift my focus back to my commissions.
    The uncertainty of it all weighed on me, knowing that it could have been something far more serious and even life-threatening. This experience was a reminder to take health concerns seriously and not ignore even the smallest signs.

    Despite the stressful situation, the trip had some fun moments too. We got to spend time with friends and family, which helped take my mind off things. My partner, friends, and I went to the cinema to watch Thunderbolts*, which felt like a refreshing take from Marvel. We also checked out Fanfes at OneAyala Mall and got hooked on FANTASY LIFE i: The Girl Who Steals Time. Even though it was a short trip, I’m really happy with how we made the most of it.

    I truly appreciate all the well-wishes from family, friends, and everyone who checked in on me. Thank you all for your support!

  • These past few weeks, I’ve been fully locked in. The heat’s been so intense that I had to switch back to a night shift schedule. I just can’t get anything done during the mornings or afternoons. Despite that, I managed to finish rigging three commissions and an add-on from a previous client, so it’s been productive.

    That said, I really want to share a model I’m super proud of! I recently finished rigging it, and it included some features I’ve never worked on before.

    It’s actually my first time rigging hair like this, and I’ve got to say, the artist, Noto_2D, did an amazing job adding the back hair parts I requested.
    I gave her a visual guide to help her just in case!

    I didn’t want to make compromises on the parts the model originally had before adding the back hair because, first, I didn’t want to misrepresent the artist’s work, and second, it wouldn’t reflect my rigging properly if I went ahead with it. Stretching the hair parts would’ve looked unrealistic, so I avoided that.

    Sometimes you’ll encounter artists who refuse to cooperate and revise the parts and don’t allow cutting, which can be frustrating, so I appreciate and will always recommend artists who work alongside riggers to make sure the model gets all the love and care they deserve!

    Another thing was the Kabedon toggle. The model has a Body Lean paired with the Kabedon arm toggle, and I’m pretty happy with how it turned out! Huge thanks to Noto_2D for sharing reference images beforehand. She has been super helpful, and I really appreciate it.

    My client, Kailyle has also been very kind throughout the process, and I truly appreciate both of them.


    After wrapping up one model, I jumped right into working on another client’s project during my stream.
    https://www.youtube.com/live/oCVYAVHhMJ8?si=YutfSsMNGVHTeSiY

    It was pretty frustrating to realize that the rigging process hit some problems due to the clipping/masking limitations of Live2D Cubism 5.2.02. I had to let my client know I’d need to make some compromises for features like clipping masks. Once Live2D Cubism 5.3 officially comes out, I’ll revisit those areas.

    The main clipping issue I ran into was with the model’s pants. The pants pattern needed to be clipped to the pants, and the shine texture had to be clipped to the pattern. The problem came up when I tried to move the pattern on the pants to create a 3D effect, making it look like the leg was actually turning. This caused the shine to start showing outside the pants, which wasn’t ideal.

    Thankfully, my client was super understanding, which was a relief since it’s really important to keep clients in the loop about these kinds of challenges.

    I’m also happy to say that I’m almost finished with this model! Just need to rig and animate the last few arm toggles to wrap things up.
  • I didn’t know I’ll be into city-building games

    It’s something I didn’t realize I would be into until I started paying attention to the recent games I’ve been playing. City-building and colony sims are my go-to games that I play while I’m working on commissions. There’s just something super satisfying about watching a tiny village turn into a thriving settlement, all thanks to your choices.

    Wandering Village

    This game is absolutely stunning. The art is gorgeous and it’s probably the first city-building game I really sunk a lot of time into. It’s my top pick, not just for how it looks but for the whole concept of building a village on the back of a giant, gentle creature. It’s this mix of peaceful and challenging that keeps me hooked.

    I bought it when it was just starting out on Steam, and even then, the gameplay loop was solid. Revisiting it after all the updates though made it so much better. It’s like a whole new game! 😮

    MineColonies Minecraft Mod

    This mod was the reason I went back to Minecraft after ages. The hands-on nature of managing your colony is what makes it so engaging. You, the Governor, are involved in assigning jobs, planning the layout of your colony, and ensuring everyone has the resources they need to thrive.

    What makes it even better is how it works seamlessly with Minecraft’s existing mechanics. You can gather resources, build structures, and explore the world just as you normally would, but with the added layer of managing your colony.

    Adding shaders to the mix makes everything more immersive, with stunning visuals enhancing the whole experience. I highly recommend shaders like BSL Shaders or Complementary Shaders – Reimagined.

    Stacklands

    Stacklands is so unique, it’s hard not to love it. Everything in the game, villagers, food, creatures, is represented as cards that you have to stack and play strategically. It’s creative, clever, and honestly, I lose track of time every time I pick it up.

    SummerHouse

    When I need to chill, Summerhouse is the vibe. It’s super sandbox-heavy so I can just take my time, try out different ideas, and relax. There’s no rush or pressure and that makes it the perfect escape.

    And of course, I’ve got my wishlist. Games like Anno 1800, Timberborn, and Ratopia are just waiting for me to dive in.

    Hopefully I’ll get the time to grab them and play soon once I’m done with my commissions.

  • Bought a full frame lens for my aps-c camera

    Recently, I’ve been wanting to get more prime lenses for my Sony ZV-E10 II.My partner suggested going for full-frame lenses instead of APS-C ones so that when I upgrade to a full-frame camera later, I won’t have any issues.

    Full-frame lenses do work on APS-C cameras, but there’s a crop factor to consider. Still, they get the job done!

    On the other hand, using an APS-C lens on a full-frame camera doesn’t work the same way. It’s like looking at a tree through a tiny hole in a wall. If you’re just a foot away from the wall, you’ll only see 30% tree and 70% wall (at least, that’s how I picture it).


    I ended up grabbing the Meike AF 35mm f/2.0 full-frame prime lens for ₱7,900 (~$137 USD). I think it’s the most affordable one I can find on Shopee. I skipped pricier brands like Sigma for now since I’m still honing my skills.

    According to Crop Sensor to Full Frame Calculator, this 35mm full-frame lens acts like a 54mm on my APS-C camera, which is perfect since 50mm-80mm is ideal for portraits.

    I even tested it on stream yesterday while working on commissions! Here’s a quick comparison between the Meike 35mm and my Sony 16-50mm kit lens from two different streams:

    Overall, I’m absolutely loving this lens!

    For the price, having a portrait-friendly focal length, autofocus, and a wider aperture makes it totally worth buying. Plus, it’s such a great addition to my setup and I can’t wait to take more photos and videos with it! 🥺

  • OtakuFest 2025 @ Cebu Experience

    My partner, our friend, and I went to Cebu for the first time to check out OtakuFest 2025 at SM Seaside City!

    It was the first time my partner and I flew on a plane. Since we’re from the province, we had to head to the airport extra early, which made things a bit stressful for both of us. We stayed at The Wings Transit Lounge at NAIA—it’s super cozy, but I couldn’t sleep at all because I was too anxious about missing our very first flight ever LMAO.

    When the plane took off, I blacked out for a few seconds because of the force. Luckily, I didn’t get airsick at all during the flight. I got the window seat and noticed the wings kind of wobble a bit. It was pretty nerve-racking to watch, but I guess that’s just how it is.

    When we landed at Mactan-Cebu International Airport, we were met by the nice sea breeze. Sadly, we didn’t get to take many photos since we were pretty tired from the trip.

    We went to Ayala Center Cebu mall close to the hotel we’re staying at to get something to eat. The mall is so spacious and surprisingly not a lot of people compared to its Manila mall counterparts. Definitely a breath of fresh air, though!

    The next day, we kicked off our first day at OtakuFest 2025 at SM Seaside City Cebu. We got there pretty early, so most of the booths were still being set up. I even managed to capture the moment of the staff setting up Dokibird’s Meet and Greet booth featured in the video I put together, which you’ll catch at the end of this post! While waiting for everything to be ready, we grabbed some Japanese food at Matsunoya.

    On Day 2, I didn’t get the chance to take a lot of photos as I we’re worried it might rain during the event, but I took the risk and managed to capture a bunch of videos instead! It was such a fun day that I was more focused on being in the moment than snapping pictures. If you’re curious to see how it all went down, you can check out the video I put together over on my second channel. Hope you guys enjoy it!

    Overall, our first trip to Cebu for OtakuFest 2025 is definitely a core memory for our friend, my partner and I. From navigating our first-ever flight to enjoying the event, food, and scenery of Cebu in a span of 4 days. It’s pretty fun getting to explore the booths in an open area, talk to people, and capture some unforgettable moments. Massive thanks to everyone who made the event so much fun, and thank you for following along on this journey.

  • When you rig something in Live2D for the first time…

    It makes you nervous when you’ve never done something before, especially in Live2D. You don’t know whether or not you’ll be able to execute things well. since you’ve only imagined how it’s going to work in theory.

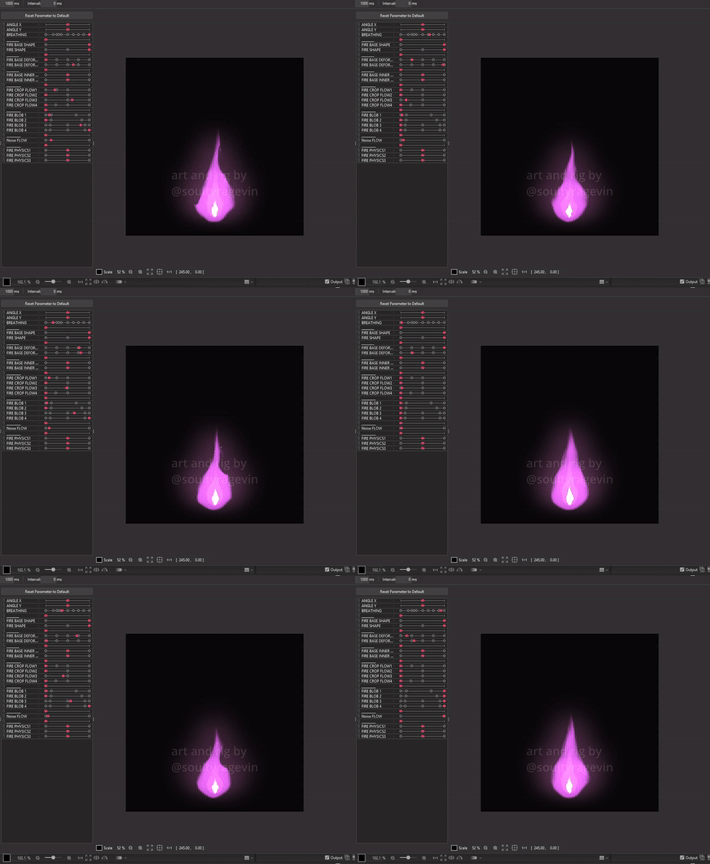
    I attempted my very first Live2D rig and animation of a fire.

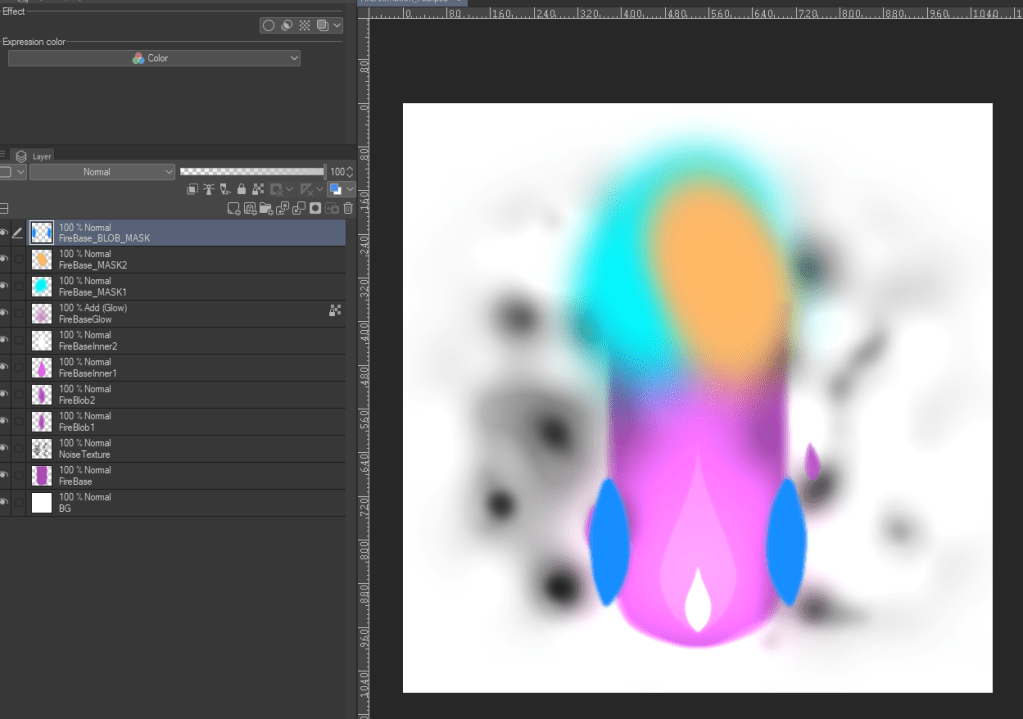
    Here’s how the layers are laid out in the PSD file. The noise texture and colored blobs are used for inverted masking and set to 0% opacity in Live2D.

    Note as of June 6, 2025: I’ve since discovered a more optimized way of doing the flames so I don’t recommend this method!

    The ideal way to do this is by using Adobe After Effects to create the fire, exporting it as a PNG sequence, and then bringing those PNGs into Live2D. That said, it’s a pretty tedious process since you have to assign each frame to a single parameter. Plus, it can get resource-heavy because you’ll need to generate meshes for every imported PNG frame. But hey, the end result will totally be worth it!

    Here’s what it looks like if it’s done via PNG sequence from Nonon’s work.

    It’s also something I’ve done during my latest stream earlier. I was rigging a Live2D model’s eyes and brows first and then moved on to rig the model’s special eye toggle—the Cloud Eyes toggle. Do give it a watch if you’re interested in learning more!

  • Welcome to my Yapping Corner! I’m Soulty Ragevin—an artist, animator, and VTuber who’s all about Live2D art and rigging. Basically, I help bring VTubers to life!I livestream as a VTuber over on Twitch, YouTube, and Tiktok, where I stream my works and occasionally stream games during my free time.

    Outside of VTubing, I love taking photos and videos whenever my partner, JustSiga, and I go out. We’re both into photography and videography, so you might see me posting about real-life stuff here, too!

    Here are some of the photos I’ve taken:

    Here are some of the videos I’ve taken:

    I’ll admit, I haven’t uploaded too many videos yet. Editing takes time (especially for convention footage), but I’m working on it! I’ll try to upload them here on my secondary channel so keep an eye out for updates!

    Aside photos and videos, I love gaming. However, I haven’t been able to indulge in it much lately due to commissions and real-life.

    Video games I’ve played:

    • Blasphemous
    • Hollow Knight
    • Risk of Rain 1 and 2
    • Dave the Diver
    • The Wandering Village
    • …and many more!

    I also play Magic: The Gathering with my friends in the Commander format. I’m the Eldrazi user in the group due to my fascination in Eldritch and alien themes. If you’re curious about the decks I have, feel free to check it out on Moxfield!


    So yeah, this blog is where I’ll be sharing things that interests me that interests me. From Live2D, VTubers, photography and videography, gaming, and more!Thanks for stopping by at my Yapping Corner and I’ll see you on my next post! 😀